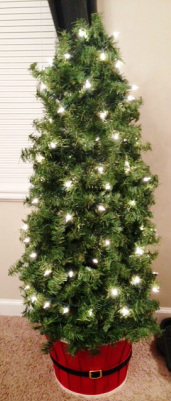
How to Make Inexpensive Indoor/Outdoor Topiary Trees (Tomato Cage & Garland)
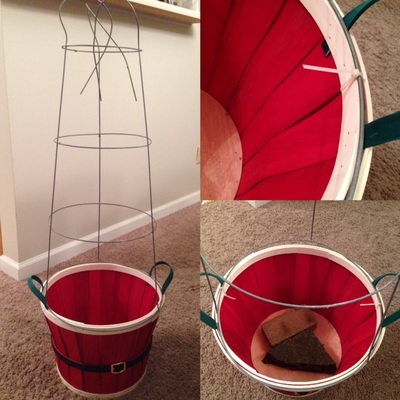
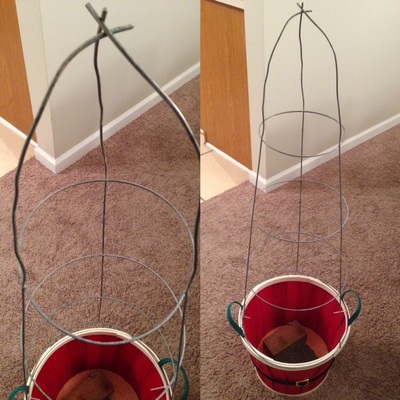
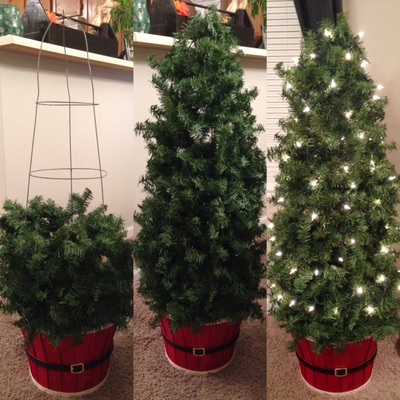
Select images below for close-up details of each step
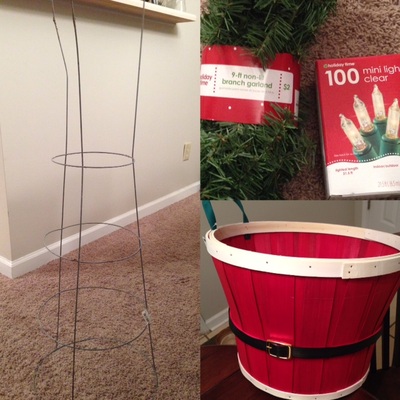
Materials Used:
  • 1 Tomato Cage (size of your choice)
  • 5 Nine Foot Bundles of Garland (9' bundles at Walmart: $2 each!)
  • 1 Box of 100 Lights
  • 1 Planter Box or Bucket (that the large end of your cage will fit nicely on or in)
  • Clear or Dark Color Zip Ties
  • Wire Cutters
  • Rocks/Bricks/Heavy Smaller Objects (to weight down if placing outdoors)
Picture
Directions:
  1. Begin by placing your tomato cage atop your planter; the largest opening in on the base
  2. I secured it to the bucket by zip-tying the wire down
  3. Next, place a couple objects in the bucket to weigh it down, if you will be placing this outdoors
  4. Carefully bend the top prongs of the wire cage into one another, forming your ideal tree shape
  5. Using wire-cutters, snip the excess metal from the top metal prongs to better form the top of the tree
  6. Begin stringing the garland at the base. I had to secure the garland to the base of the wire with a couple more zip-ties to ensure it stays in place.
  7. Continue covering until all garland bundles are used, securing each bundle to the wire with the hook end
  8. Cover the garland with your lights, and Voila!
 
Picture
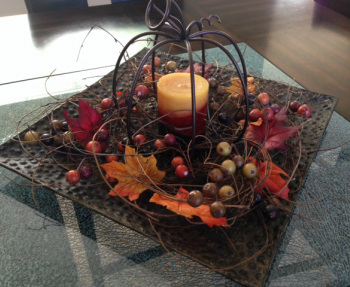
Every dining room table, or coffee table, needs a splash of color and excitement for the holiday seasons.  This Autumn color inspired centerpiece is the perfect addition to your home for the Fall season!

Materials Used:

  • Bundle of Vine or Miniature Vine Wreath (broken up into various sized pieces)
  • Autumn Colored Candle
  • Berry Twig Stems
  • Faux Leaves
  • Metal Pumpkin Shaped Candle Holder Centerpiece
  • Centerpiece Tray of Your Choice

Directions:

  • Start by placing the metal pumpkin in the center of your tray
  • Arrange the broken up vine pieces around the pumpkin, and throughout the tray
  • Add the leaves and berries, as you see fit, ensuring to spread them out over the tray
  • Place the candle inside the pumpkin, and set atop your table!

 
Picture
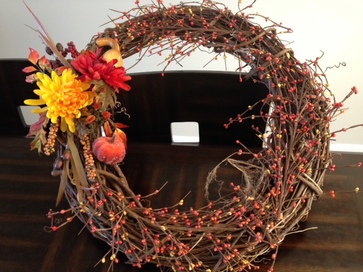
This Fall inspired wreath was made with various material from the craft store, and relatively easy to do!

Materials Used:
  • Vine Wreath (sizes vary on choice)
  • Berry Garland or Berry Twig Stems
  • Faux Flowers/Leaves
  • Plastic Pumpkin, Gourd, etc
  • Super Glue or Hot Glue


Directions:
  • Begin placing the berry garland/stems around the wreath, gluing in a few places to remain in tact
  • Place the flowers and plastic accessories in your desired area, gluing each item to the vine wreath
  • Most metal wreath holders will fit nicely in the intertwined vines to hang from the door

 
Picture
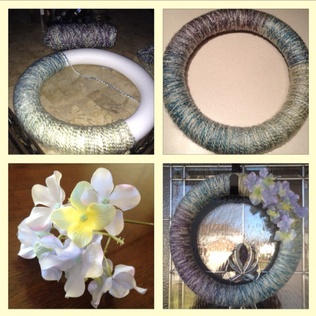
Looking to spruce up your front door with a welcome to the new season?  This Spring inspired wreath can be made for under $10 using the yarn color of your choice!

Materials Used:
  • Styrofoam Extruded Wreath ($3.99-$4.99)
  • Multi-Color Yarn ($3.99)
  • Flower Accents ($1.99)
  • Super Glue or Hot Glue

Directions
:

  • Simply glue one end of the yarn to the styrofoam wreath
  • Continue to wrap the yarn around the styrofam until completely covered (you will have to push the yarn closer together as you progress)
  • Glue the final end of the yarn to the back of the wreath (so not to show in the front)
  • Clip the faux flower stems short, and glue the flowers in your desired area.